|
How to improve your trigger function
by
installing an overtravel stop in both
pull and release.
Tools and equipment needed:
An acetylene or mapp torch, silver solder, epoxy glue or
Loctite, a drill and drill bits, suitable pieces of brass
tubing/rod and plate, needle files, needle nose pliers, a
couple of screwdrivers to aid in assembly / disassembly. A
lathe is preferable if available. Otherwise the sleeve
part will need to be outsourced.

If you assemble your
trigger mechanism
incorrectly it might cause misfires,
or other malfunctions. Beware that the only safety device
in the triggergroup is that the trigger is blocked.
Altering the shape of any of these parts or removal of
material *might* render the trigger mechanism unusable at
best, or right out dangerous in worst case.
If
you choose to proceed, you do this on your own risk, and
if you somehow manages to break or otherwise ruin your
trigger mechanism or parts thereof, well that is your problem. If you are not 100% sure
that you can manage to do this, don't do it, or pay
someone competent to do it for you.
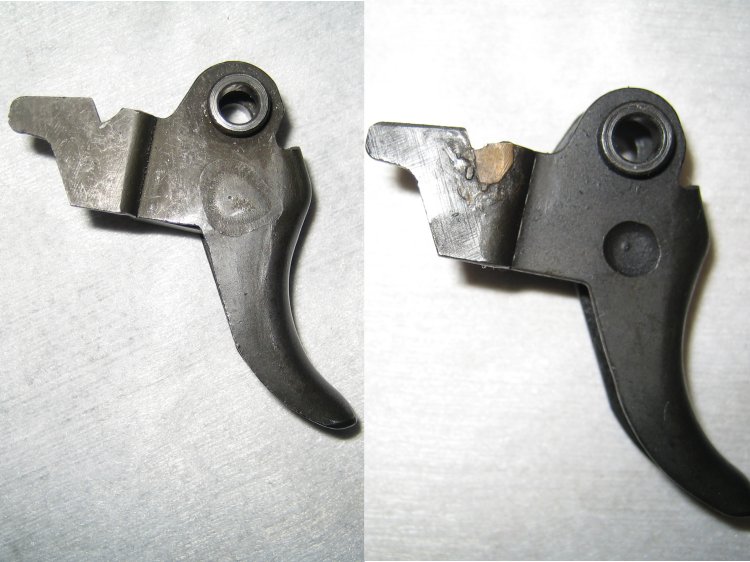
1.
Modifying the trigger.
This modification will remove rearwards overtravel.
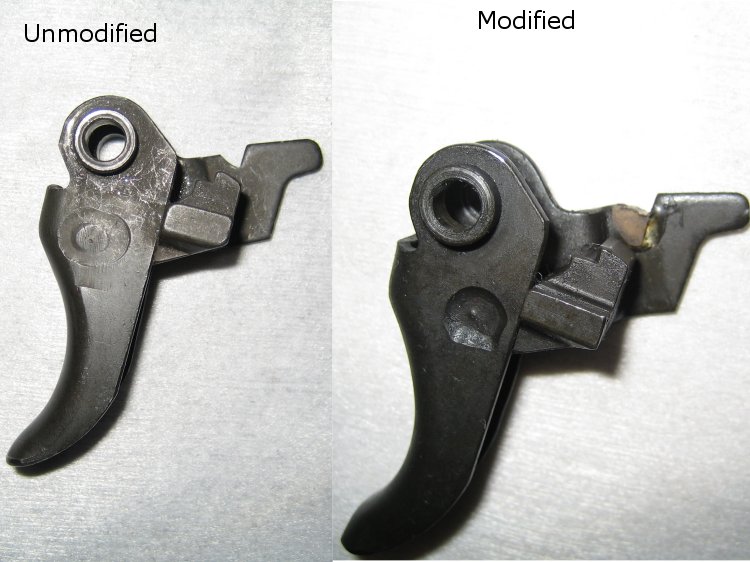
The modification consist of silver
soldering a piece of brass to the notch in the trigger
that is engaged by the safety selector.
It can of course be welded steel, but I found it easier to
use silver solder/brass
due to it requires less heat, and the brass is easier to
shape when fitting the pieces together afterwards. Be
careful when applying heat so that the heat treated parts
engaged by the sear don't get too hot.
Fitting:
File the brass piece down in small increments to the
point that trigger travel ends just after the hammer is
released. To find this point will more than probably
reqiure that the trigger mechanism is assembled and
disassembled several times.
Test the trigger action several times to make sure the
trigger releases the hammer each time it is pulled.
Note that this modification will remove the full auto
function if done to a FA trigger mechanism, as the FA
function needs the longer trigger travel to hold the sear
clear of the notch in the hammer.
2.
Modifying the trigger housing.
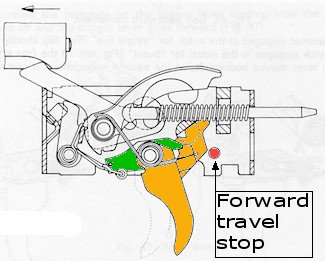
This modification will remove the forward overtravel.
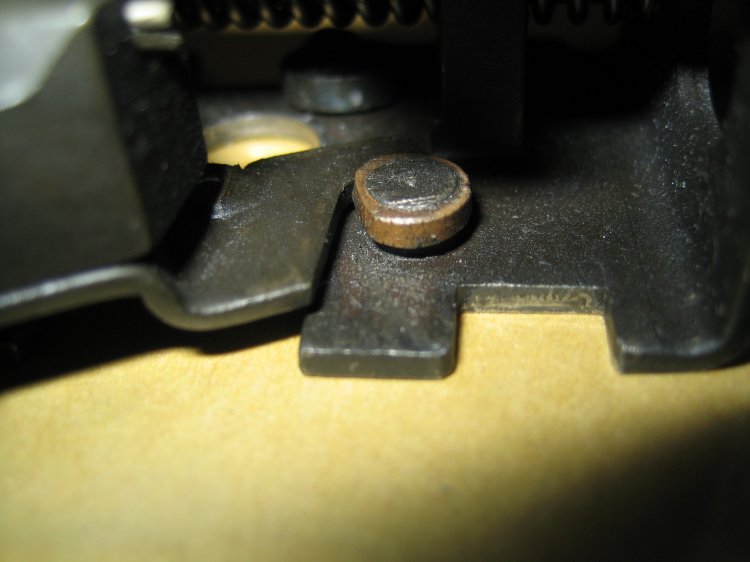
This modification consist of making a
brass sleeve for the forward travel stop bolt. The sleeve
itself has an outside diameter of appx. 6.5 milimeters and
an inside diameter of 5.0 milimeters. The length should be
about 2.5 - 3.0 milimeters.
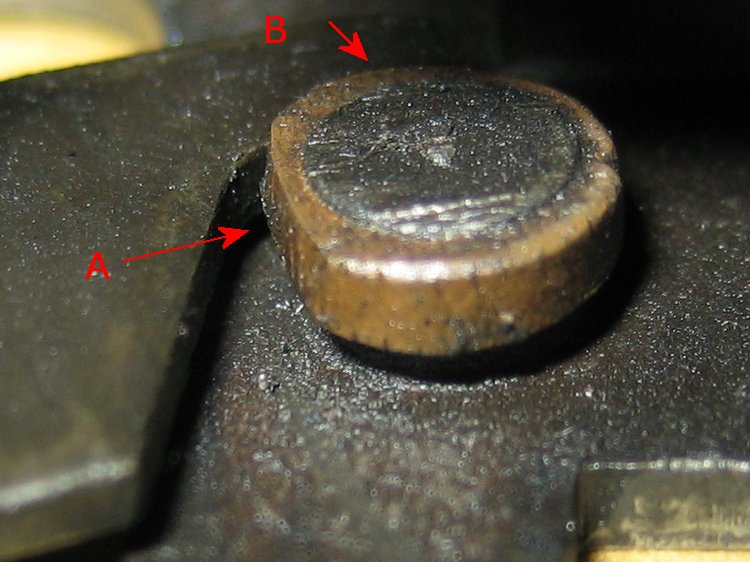
Fitting:
Remove material from the
area
A
in the above pic
in small increments to the point that
it don't impede on trigger rearward
travel.
To find this point will more than probably reqiure the
sleeve to be removed and installed several times.
Remove material from the
area
B
in the above pic
flat in small increments to the point that trigger
forward travel ends just after the sear engages the
trigger. This is easibly recognised by an audible "click".
To find this point will more than probably reqiure the
sleeve to be removed and installed several times.
Test the trigger action several times to make sure that
sear engages the trigger each time. When the trigger
functions flawlessly, attach the sleeve with epoxy glue,
Loctite 640/660 or similar.
Another trick is to use an MP5 trigger spring in the G3 to
get a lighter trigger pull,
but this will normally cause the odd misfire in surplus
ammo due to the hard primers used in military ammo. This
modification should work fine with commercial ammo with
softer primers. |